基于Github+Hexo搭建个人博客
背景
我一直想建立自己的博客站点,已经购买了域名和服务器。但由于国内不允许个人博客进行备案,这个计划就暂时搁置了。目前,我使用WordPress搭建的站点,只能通过IP地址访问。
最近,我看到了别人使用GitHub Pages搭建的博客,这激发了我的兴趣。经过一番研究,我发现使用GitHub Pages搭建博客不仅免备案,还自带HTTPS证书,省去了很多繁琐的步骤。
虽然我之前一直使用WordPress,两种平台各有利弊。WordPress需要自己管理服务器和HTTPS证书,维护相对繁琐。不过,它的优势在于插件众多,后台编辑器对新手非常友好。相比之下,Hexo支持的是Markdown编辑,可能对一些用户来说不够直观。但我也找到了一个适用于Hexo的文章编辑器,web-hexo-editor,对于喜欢尝试新工具的朋友来说是个不错的选择。
接下来,我将详细介绍如何使用GitHub Pages和Hexo搭建个人博客。这种方法不仅简化了博客的搭建和维护过程,还可以让你免于处理服务器和证书的问题。
Github 准备工作
#打开 Github 官网, https://github.com/,申请注册一个账号。
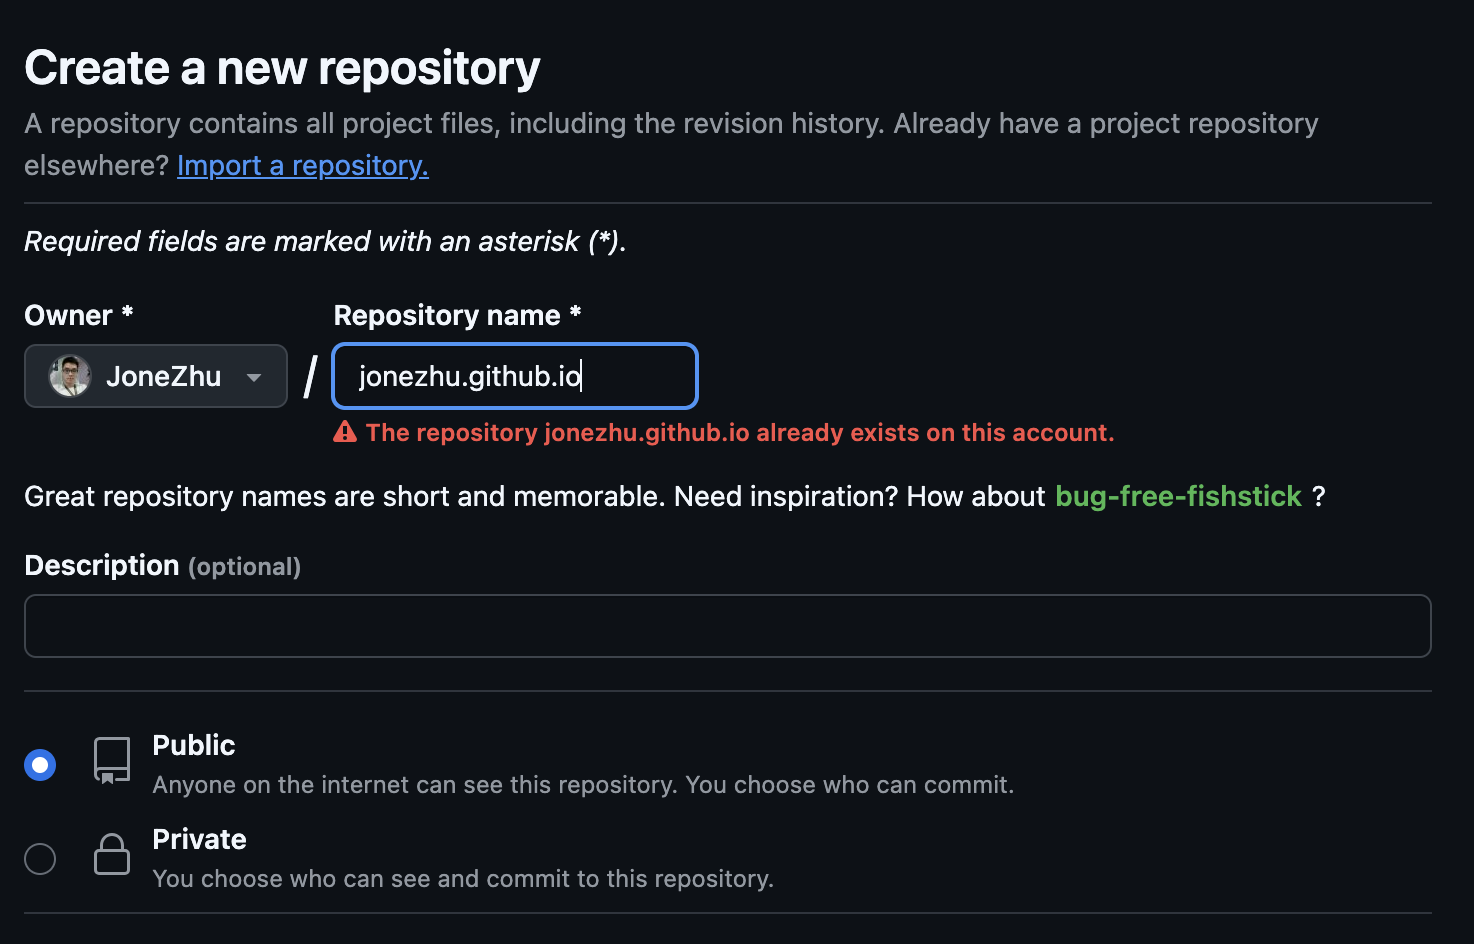
创建一个名为【账户名.github.io】的仓库
假设账号是: jonezhu,则建立博客仓库名为:jonezhu.github.io。
- 1.创建仓库
将仓库属性选择为公开的:public。
- 2.克隆仓库
1 | git clone https://github.com/username/username.github.io |
- 2.Hello World
1 | cd username.github.io |
-3. Push it
1 | git add --all |
- 4.通过浏览器访问https://username.github.io
在 GitHub Pages 上部署 Hexo
- 安装 Hexo
1 | npm install -g hexo-cli |
- 新建一个文件夹【username.github.io】
- 请执行下列命令,Hexo 将会在指定文件夹中新建所需要的文件。
1 | hexo init username.github.io |
初始化后,您的项目文件夹将如下所示:
1 | . |
- 在储存库中前往 Settings > Pages > Source 。 将 source 更改为 GitHub Actions,然后保存。
- 使用 node –version 指令检查你电脑上的 Node.js 版本。 记下主要版本(例如,v20.y.z)
- 在储存库中建立 .github/workflows/pages.yml,并填入以下内容 (将 20 替换为上个步骤中记下的版本):
1 | name: Pages |
- 合并初始化目录和仓库内容
1 | [#] 初始化本地仓库 |
这个时候从Github Action 就可以看到构建记录
- 部署完成后,前往 username.github.io 查看网页。
更换Hexo的主题(https://hexo.io/themes/)
hexo 有四百多款主题,更换主题也非常简单方便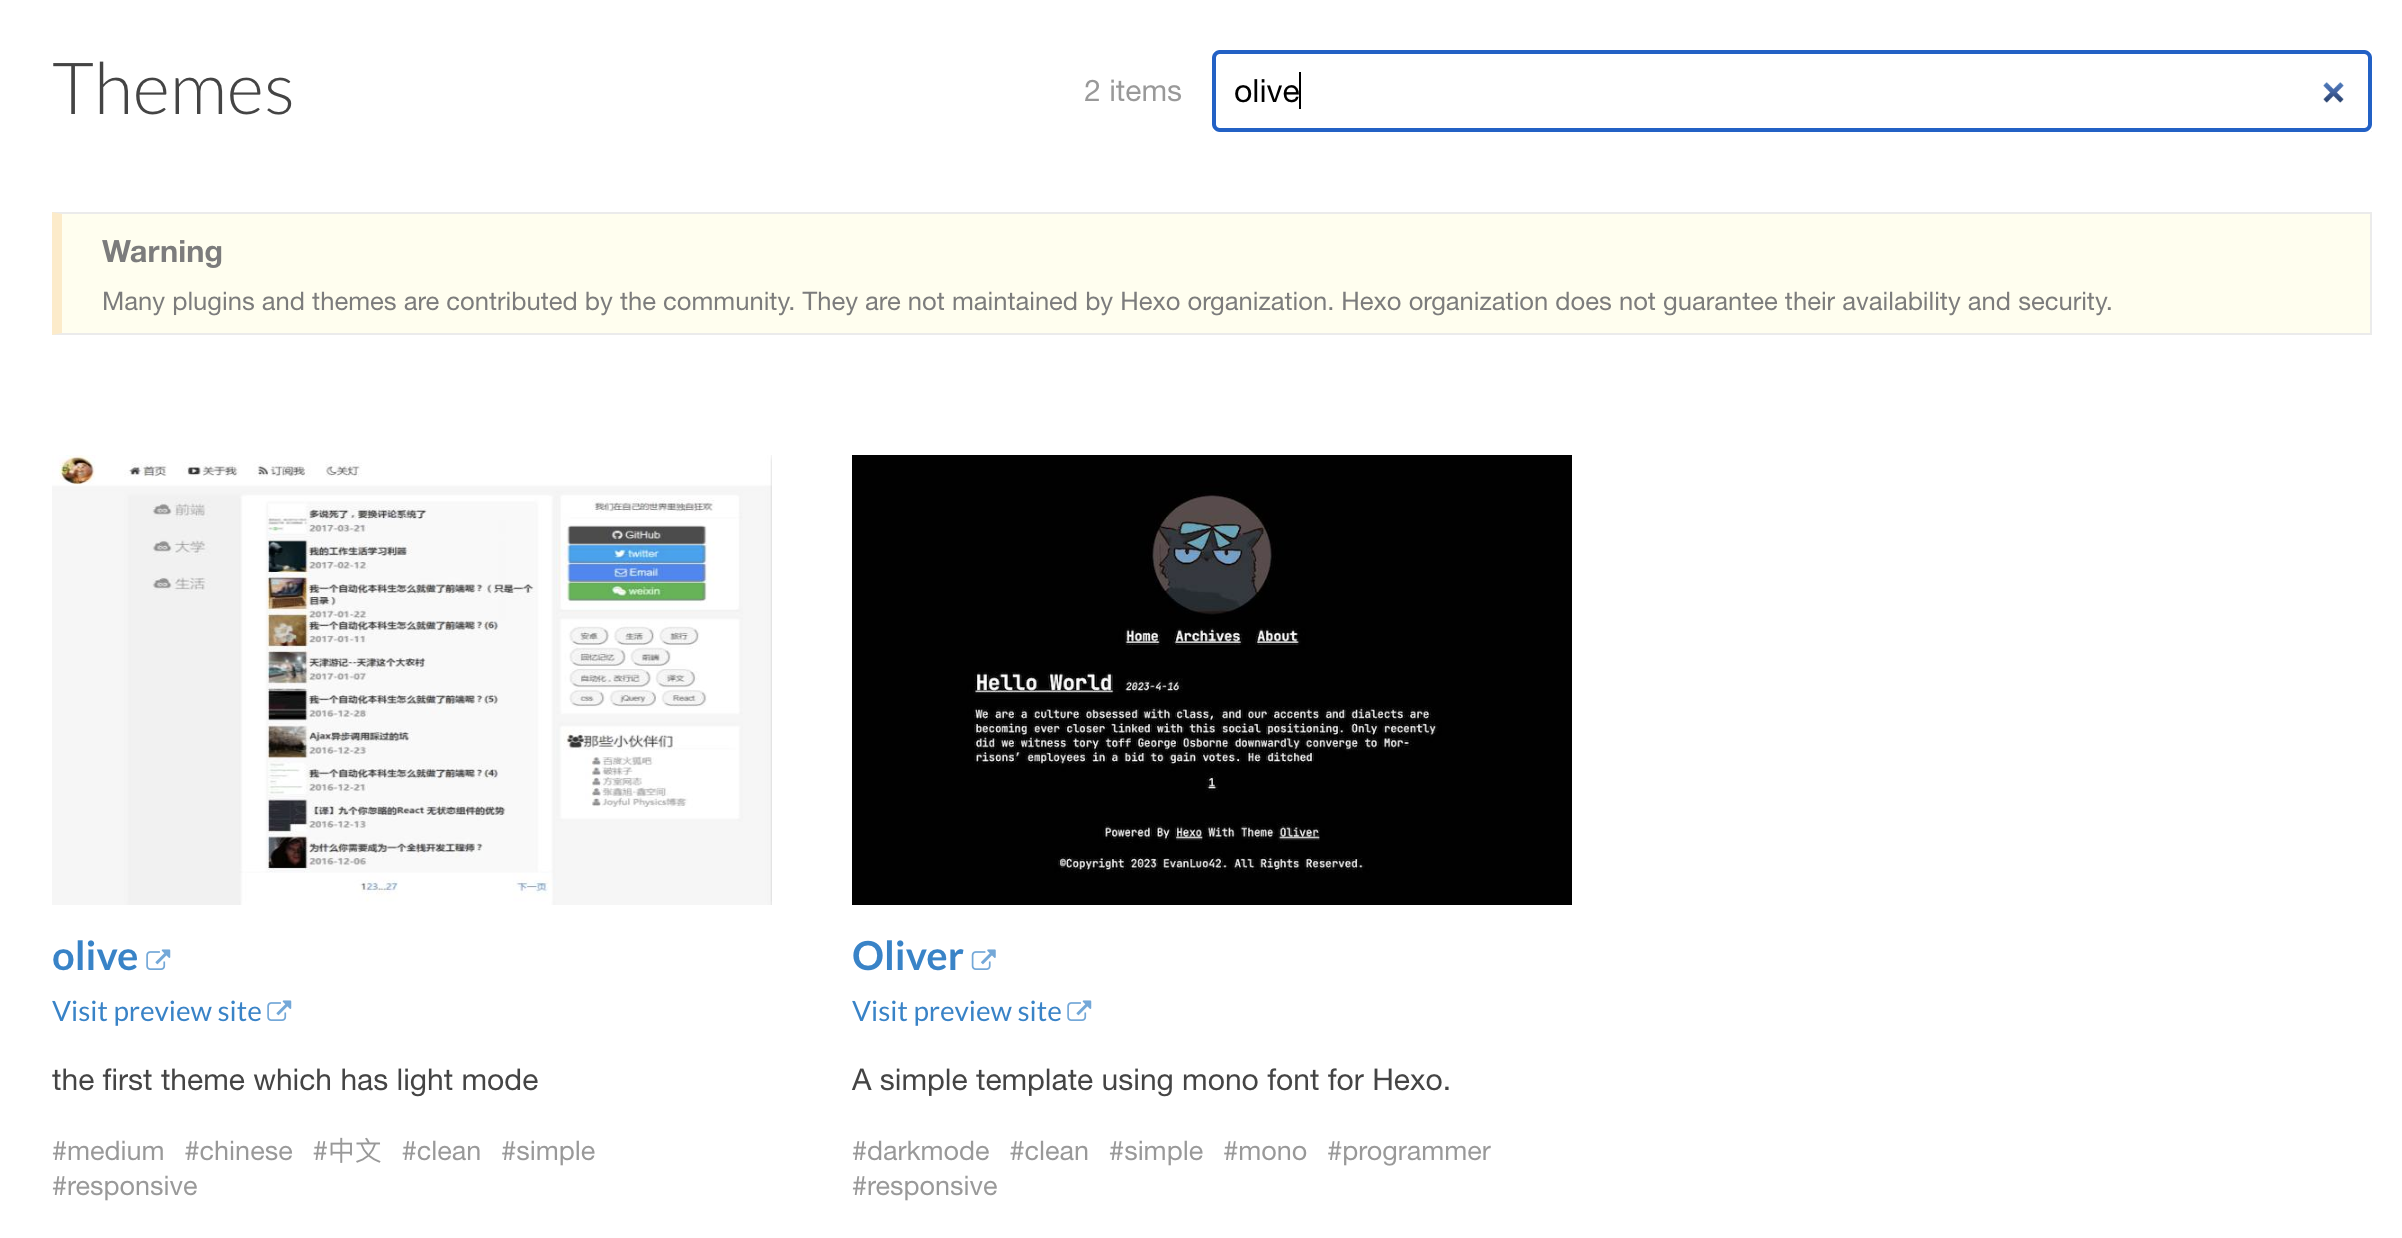
- 选择你喜欢的主题,以olive为例
- 点击 olive 跳转到github页面,获取 主题的clone地址 https://github.com/zhangolve/hexo-theme-olive.git
- 添加submodule
1 | git submodule add https://github.com/zhangolve/hexo-theme-olive.git themes/olive |
这条命令会在 themes/olive 目录下克隆 hexo-theme-olive 仓库,并将其作为子模块添加到你的项目中。
- 初始化和更新子模块
1 | git submodule init |
这些命令将初始化本地配置文件,并从子模块的仓库中拉取所有必要的数据。
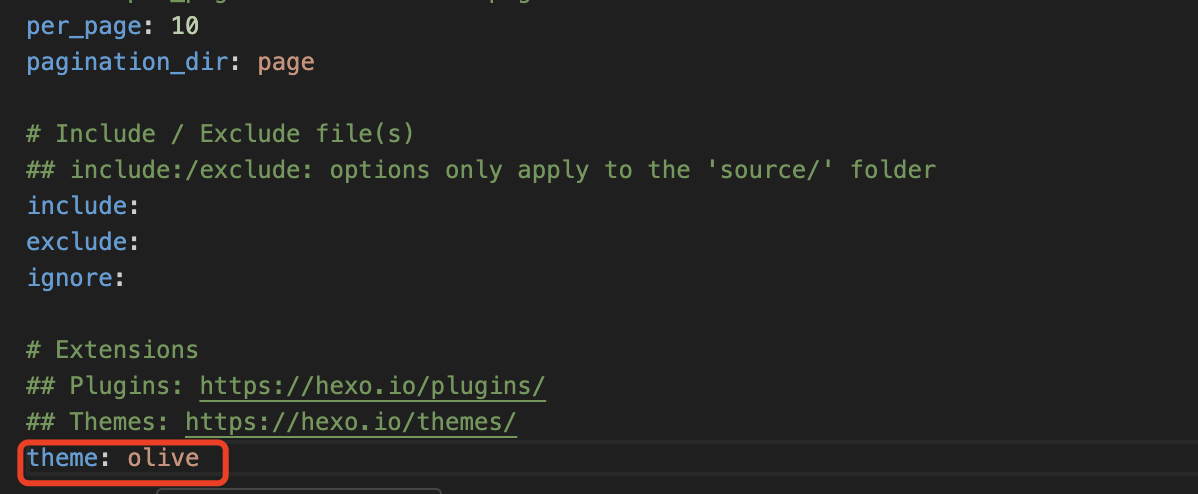
- 更改根目录下的 _config 的theme的配置

- 更改根目录下的 _config 的theme的配置
- 提交和推送更改
1 | git add . |
- 部署完成后,前往 username.github.io 查看网页。